
This weeks designer is Michelle (click link to be whizzed of to her blog, which is brilliant), I have to admit I really love her style to look at, but never thought I could have a go, but have a go I did lol. After all this I am really excited as I think I'm finally ready to have a go in my art journal that I bought LAST January!!! lol
I'm afraid I have took lots and lots of photos of the finished creation and also bits in between. Then after going through some of the steps I couldn't just stopped there I decided to put Fresco paint through it's paces (wow it really lived up to the job, it's amazing), so I have took pictures of each one (brayering, resist, crackle, spray, swooshing). I am also going to link my products back to the Paperartsy site so you can be tempted lol, and the colour writing is the step by step (saves you reading all my waffling!!!)
Here Goes
This is the box I have altered to make a tag box, Michelle made
a tag wooden bag and I so loved the idea as I
am always having random goes at techniques lol
I removed the lid, sanded inside and out then did 3 coats of gesso,
you can use snowflake, but I use snowflake fresco paint
for everything and am already on my 2nd bottle so I used gesso lol

I used some old torn book pages with modpodge, you can use Paperartsy Satin Glaze
as this is just as good. Then I used Snowflake Fresco Paint watered
down to give a wash over the torn book pages.
Next I used Fresco Mermaid and Fresco Beach Hut to
roughly paint lightly over the box (please note that
all I do on the outside is repeated on the inside as it
was I sort of tested everything on the inside before doing the outside!!!)
I used the Beach Hut over the areas with the book paper as
this paint is translucent so you can still see bits.
I stamped with Snowflake the Ink the Dog Mini 22 Stamp, a fantastic
trick by Leandra is to use scrap paper while stamping so you
get the look of random, click here to read and watch the YouTube video
showing you how. Next I used scrap sequin waste as a mask and
sponged Autumn Fire Fresco Paint through it on the inside of the box
and used a Tim Holtz mini mask on the outside.

Next I mixed Claret Fresco Paint with some texture paste, then
spread through a polka dot mask by Creative Expressions.
I then used a pencil with a rubber at the end, dipped the rubber into
the Claret Fresco paint and dabbed onto the box.

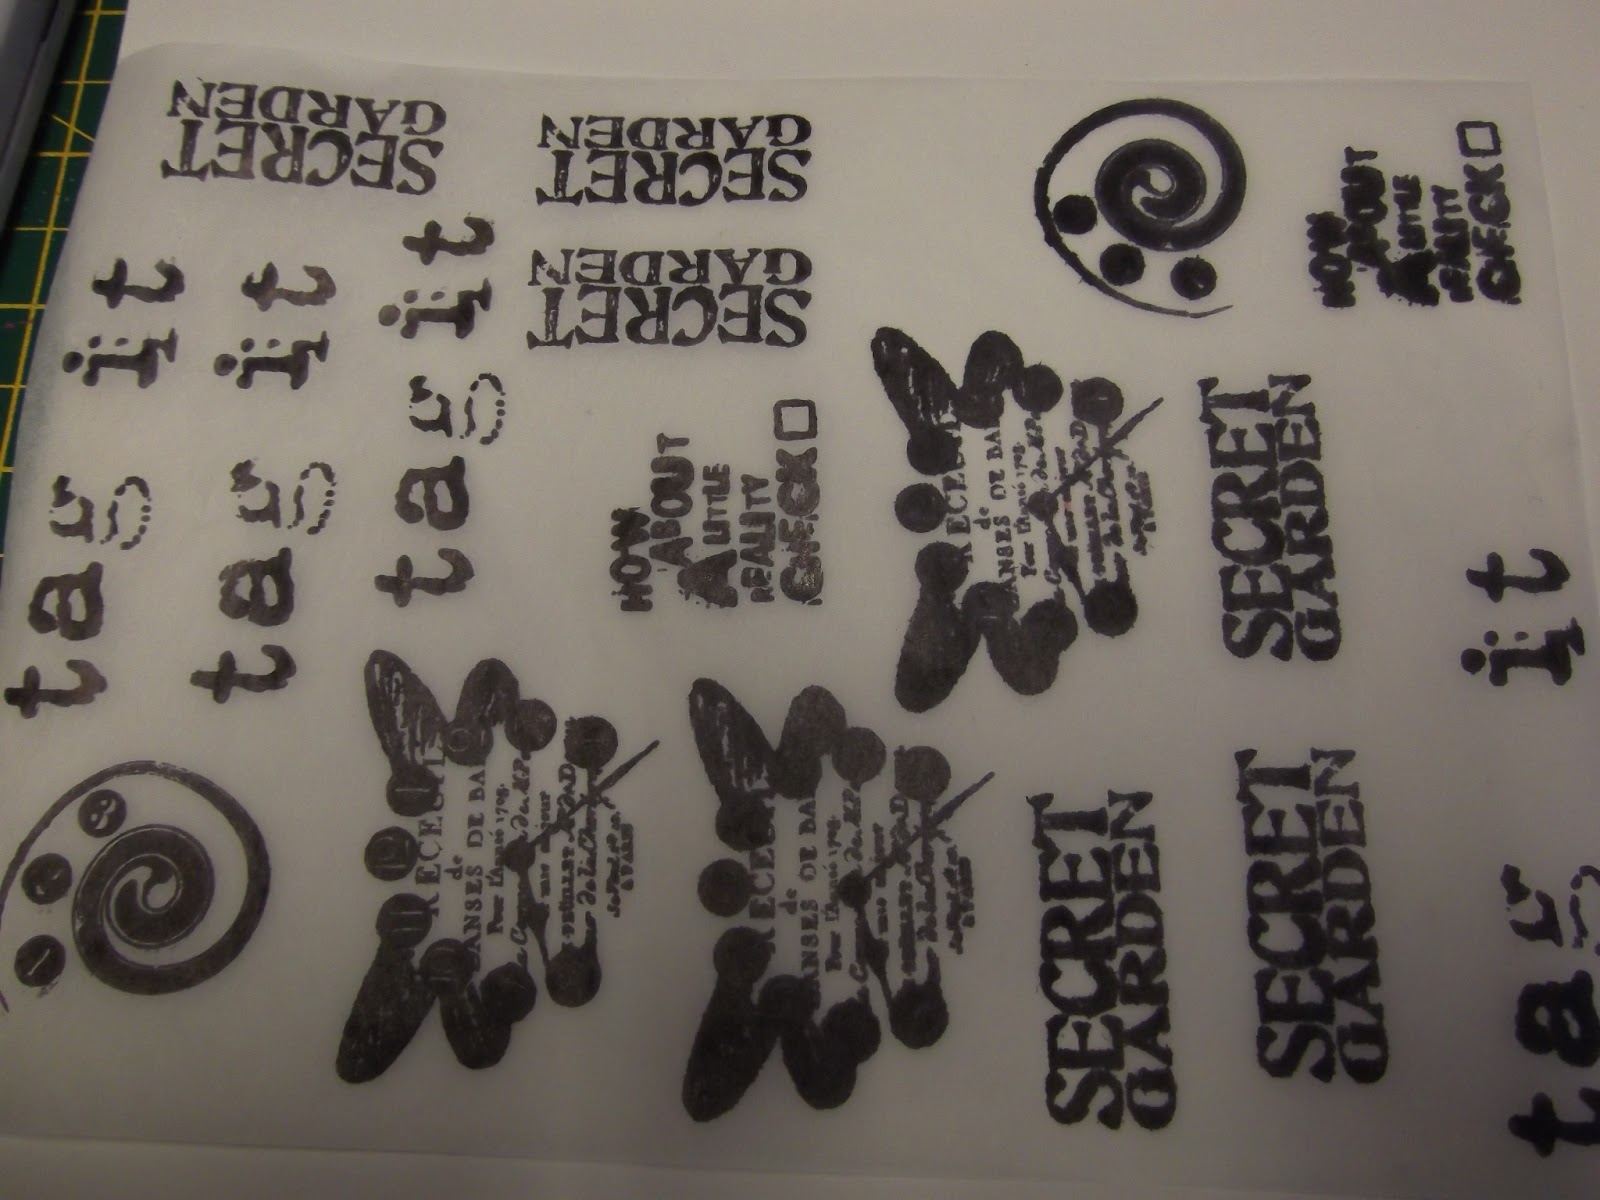
I decided what stamps I wanted to use which was - the Secret from
Hot Pick 1005, the Swirl from Ink the Dog Clocks 6, the Clock with wings from
Ink the Dog Eclectic 4, the Reality Check from Hot Picks HP1008, the Tag It was from
alphabet Ink the Dog Words 2 and the Me from Ink the Dog words 4 and the Time saying
from Ink the Dog Clocks 6. These were all stamped on the wonderful
Crackly tissue paper. I used Archival jet black inkpad and as you can
see from the picture below the bottom half was the first ones
I stamped, but when I came to use them they had spread, this
is because I hadn't dried it with a heat gun so it had spread,
you can really see the difference in the clocks as when dried you can see the numbers :-)
Next I used modpodge to add the tissue onto the box. When dried
I used a top off a Ranger dabber and a small water bottle spray
and with Claret Fresco paint I splodged the tops into the paint
so it was really thick and stamped it onto the box, the
thickness gives great texture as well, to make it thicker you can use
a heat gun until it bubbles. I learned all this from Trish Latimer's DVD.
Then I watered down some Beach hut, and went on a flicking spree, the
idea came from Michelle's 3rd art piece, it really gives some depth.
I used a itunes money card thingy (you can use old credit card) to make
stripes, the paints I used was Claret, Beach hut and Snowflake Fresco paints.
I also used the snowflake with the nip of a pencil to make the dots and I also
used Little Black Dress Fresco paint to make dots as well.
To finish I used Little black dress with my finger to smudge
all the edges.
The following is a few pictures of the finished Tag box


I decided that I need to fill my tag box, I already has some
that I had used the salt technique on but I wanted to try
out some Fresco paint techniques. Here is a brief
description of what I did (p.s I couldn't get the salt
technique to work with it as it kept sticking to the paint!!! I did
say I tried everything lol lol)
Now Crackle Fresco Glaze is the most amazing and quick product.
I know you can use the watered down glue way but I never get
it right but this way it takes about two minutes or less!!! Really lol
You paint on the colour you want at the bottom, dry with
heat gun, next spread on some crackle glaze, dry with heat gun
or leave to dry, then paint on top layer wow it
starts crackling immediately, and when you use
the heat gun it rapidly crackles.
I am showing a ATC I did a while back as I already
used the blue tag in this post:-)

Now this effect I loved, I used fresco paint through sequin waste,
stensils and stamped with it, then used Distress stain over the whole
of the tag, which tinted the paint a little bit, but wow what
an effect, I also splashed water on it to give it extra effect.
The stamped version was done with snowflake but
I stamped the sentiment fine but wasn't hard enough with the
flower as you can hardly see it.

I definitely want to revisit this as I didn't have much
time left. I used a brayer, the blue tag if you enlarge
the picture you can see some squares on it as I brayered over a
embossing folder first. The orange tag was done with a brayer that
had an elastic band wrapped around, then to give it
a lighter effect I used a lighter colour over it.

Now this effect was amazing and each tag was done on different
levels show below.

This was Mocha mousse and snowflake dripped
onto a craft sheet and water added, then I swished and swoshed.
Each time I left it dry and then did it all again around 5 times and wow
doesn't some areas look like melted chocolate, the texture is amazing.

This was Lilac and Vintage lace, with the above technique but
before the water added, I used a cocktail stick to make swirls,
and if you look closely you can see the marbling effect, this was only swished
3 times.

Same again but using Very Berry (gorgeous) and Snowflake
but only swished lightly 2 times to give an almost completely flat to
stamp on.

Spraying, I mixed the paints into a mini mister with some water,
the green and blue tag had a thicker mix and was only
sprayer a couple of times where as the other tag
was more watery and was layered and dried in between around
7 times, the white is the snowflake, amazing look.

And now I proudly own a tag box, and I loved every second
of making it, panic set in at some points and I nearly gave
up but the final piece I'm really proud of.

And for some fun, my desk, yes even though I was flicking in a box
it really didn't seem to be flicking much, until I realised that yes the flicking
worked but not where I wanted it to be, all over my work desk and ........

all over the other side of the room, I know, you should see the floor, yep I think
blue flecked is in nowadays and I'm sure that others would pay a fortune
for a painty carpet!!!!!!! lol lol

Right I better go or you really will be complaining lol. Thank you all so much for visiting me.
Happy Crafting :-)
Kerry
xxx
8 comments:
Hi Kezzy so glad you have been inspired enough to join in the fun over at the PA blog. The bold stamped images work so well with the colours you chose to work with on this altered tag box holder. Have fun exploring all the different ways you can use PA goodies.
Gillian
The box is fabulous, and all those tag backgrounds look yummy - ready to play! Love the marbling - I haven't tried that yet...
Alison x
Oh My Word! Wow Kezzy, what a brilliant tag box, and the colours and stamps you've used are my favourites. I adore all your tags, looks to me like you've had a whole lot of fun, flicking paint and using the crackle glaze. I really love what you've done. Thanks for the link too. Michelle xx
Wow, that is a very cool project.
Flipping Eck Kerry, you've taken 'challenge' to a whole new level! ...epic! I found archival bled terribly on the crackly too, unless, like you realised, you are quick with the heat gun, but you may want to give versafine by Tsukineko a go, it seems to stay put, and actually stamp more detail on both smoothy and crackly surfaces. It has a higher oil content, so it does take longer to dry with your heat gun tho. And I am totes in love with the swooshing marbling effect, this I have to try, love the chocolatey one too, superb. Thanks so much for sharing your play , I think you have incorporated loads from Michelle's posts this week! Good luck.
What a great idea to make a tag box to keep all those technique tags in. Love the swooshing ones - must try that. Jo xx
what a great selection of tags in that fabulous box, you did a great job x
Absolutely stunning - you totally transformed that box and it looks like you had great fun in the process.
Thanks for sharing all your techniques for the tags to - makes me want to dig out my fresco paints and have a go as well.
Post a Comment