I would like to enter the following challenges -
City Crafter Challenge Blog - Trick or Treat
Crafty Catz Challenge Blog - Halloween
Crazy 4 Challenges Challenge Blog - Halloween
Still not over happy with it because of the
way I have put the digi stamp in the middle, it didn't quite
disappear like I wanted it to lol
The first few photos are close ups and then the rest
are the step by step, it's quite easy to do and the whole thing is completely
flat :-)
I have used the back of a canvas board, reason for this
is, on the front I had done the first steps but had put paper down first,
well when it got to the sanding it ripped terribly so I ended up starting again :-)
The bottom layer needs to be quite a thick coat so when your
sending you won't sand all the way to the board.
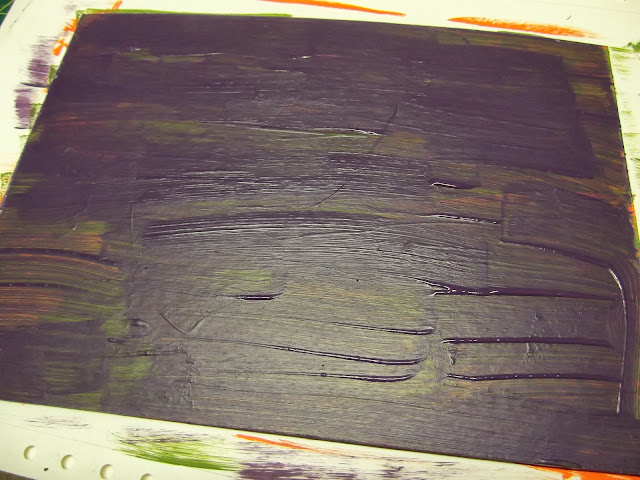
When dry add the next colour, thick in places and thin in other areas,
this means that when your sanding, when you get to the thick green
areas, chances are you won't carry on sanding further as the green is thick,
well that is the theory!!!!
Next colour thinly but in a few areas a bit thicker
Last colour black, but all of this wants to be a thin coat.
Next start sanding, it will be rather a touch job but it's worth it.
In some areas you may get to the brown board, but you just cover that over
with some black when your finished.
As you can see in some areas the board shown at the sides so
I covered it up with black.
Don't you just love that background.
Next I printed my digi stamp, I printed first on copy paper, then
went again with tissue stuck over the area that would be printed,
when I do this I use tape on the top and bottom and I use an inkjet printer.
Using tape in a laserjet, it can ruin the printer as these use heat
and well, lets just say that we have both and I learned the hard
way, luckily my OH was able to take it apart and get rid
of the melted tape!!!
Next I painted the back of the tissue tape
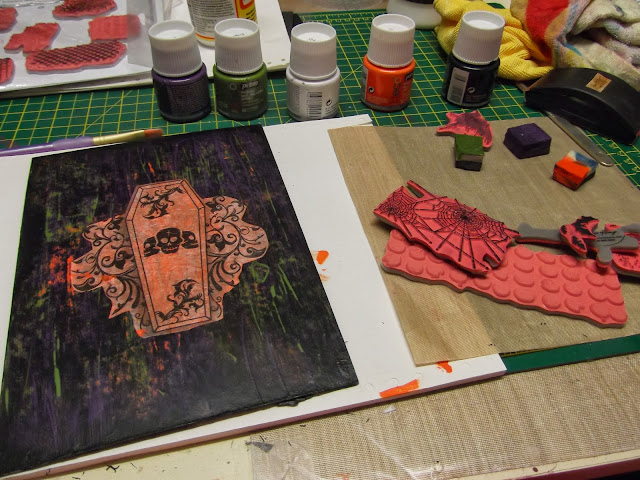
I put a layer of modpodge on my background
I stuck the tissue on top then went over all the background with modpodge
Last but not least, get your back ground paints (apart from black)
and start stamping. Because of all the layers you wouldn't believe that it's all flat.
Also the colours seem to glow and jump off the background.
Don't forget to go over the tissue with some stamping to blend it all in.
Right I better go, sorry this should have been up yesterday evening but I'm afraid my computer seemed to have issues again last night grrrrr. Going to do more virus scans, please updates etc to see if I can stop it glitching lol.
Happy Crafting :-)
Hugs
Kezzy xxxxx
Recipe
Digi Stamp - Floppy Latte (artsy coffin)
Rubber Stamps - Tim Holtz (mini halloween, ultimate grunge)
Paints - Pebeo (violet, green gold, mandarine, black)
Tissue
Modpodge


9 comments:
Wow! I think you did an amazing job! Thanks so much for playing along at CCCB!
Fabulous layers of stamping - looks so cool!
Alison x
I am in awe of how you blended the digis into this. This is an area I don't feel confident about at all!What a great idea to use the tissue, but I think if I'd melted tape on our printer I'd have to leave home, as everyone would be so furious with me! Lol! I just can't see my hubby taking our printer apart - not and getting it back together again, bless him! I love the background you created; it went so well with the Halloween theme. A great make! If I hadn't known otherwise I'd have thought you'd stamped that central image! Julie Ann xx
wonderful work Kezzy - digis are fine but I'd much rather have the real thing - especially these days! You have made it work incredibly well though and thanks so much for the tutorial! Big Hugs rachel xx
That is fantastic, I love all the layers & it looks so textured.
it's great with all the painting and sanding, thank for joining us at Crafty Catz challenge
Tilly
What a fantastic background technique! Can't wait to try it!
Thank you for your kind comments on your blog. To answer your question I didn't use the new Fresco colours. I did buy 4 at AP but I had already made these flowers a few weeks back and stores them up!
Lucy x
Totally FUN!
Thank you for joining us at CCCB!
WOW, you have put so much work into it and it looks GREAT! Thank you for joining our challenge at Crafty Catz and I hope you will come back again.
Hugs,
Anna xxx
Post a Comment