Monday 28 July 2014

Creative Expressions - ART

Good morning, isn't the weather gorgeous in the UK at the moment, I'm certainly getting some washing done lol. It's Monday which means it's time for my Creative Expressions Blog creation and this week I am playing with Dina Wakely stencils, black embossing paste and Cosmic Shimmer Iridescent watercolours.  Now initially I was planning a double page in my large journal and I have a picture later on, but it all went wrong, I had added some Creative Expressions micro beads to the embossing paste, but in they end they didn't stick so when I started painting it was a huge splodge of beads and paint leaving lumps everywhere.  Normally I add the beads to Cosmic Shimmer embossing paste and all is fine, but I think the Ranger Studio 490 black paste dries too quickly lol.  So last night it was panic stations and I ended up doing a tag instead.  As always I shall highlight the products from Creative Expressions in my step by step :-)
I would like to enter the following challenges -
Crafty Catz Challenge - Anything Goes
The ABC Challenge - P is for Pearls (black pearls on the flowers)
Through The Craft Room Challenge - Anything Goes
613 Avenue Create Challenge - Anything Goes/Optional add a sentiment
Suzy Bee's Bloomin' Challenge - Anything Goes

I have two main pictures as it's amazing how the iridescent watercolours
change in lighting :-)

You can imagine it glowing in the dark lol.  Lots of gorgeous shimmer.

Lots of close ups, again in different lighting so you can see the tag with
the sparkle and without.


And now for the step by step ...................................

I grabbed a watercolour card tag from my stash and painted it with
Cosmic Shimmer Matt Chalk Paint Citron.

Next I took the Ranger Dina Wakely Stencil Tracks and Ranger Studio 490 Black
Embossing Paste.


Next I took the Cosmic Shimmer Watercolours and spritz with water,
I started with Green Pearl

I also painted around the embossing paste over the matt paint the Citron,
if I did this again I would leave it with the matt as I think the panels would pop more.

I also painted with the watercolours in Blue Pearl, Tropic Pearl, Red Pearl, Gold Pearl
and Lilac Pearl.

I took some card and painted it black with Eco Green Paint.

Then when the paint had dried I cut out the small flowers from Creative Expressions
Craft Dies Finishing Touches Faux Quilled Blooms and Classic Rose.

I then painted some with the watercolours above.

Now this I really want to explore more, stamping with the watercolours,
doesn't the pop of colour really stand out, I used the Script Stamps from
Creative Expressions Textures Stamp Set.

Next I took some of the painted flowers and stamped with Archival Jet Black Ink Pad
the same script stamp, think this might have been better with paint.

Lots of sparkle, so loving the die cut blooms.

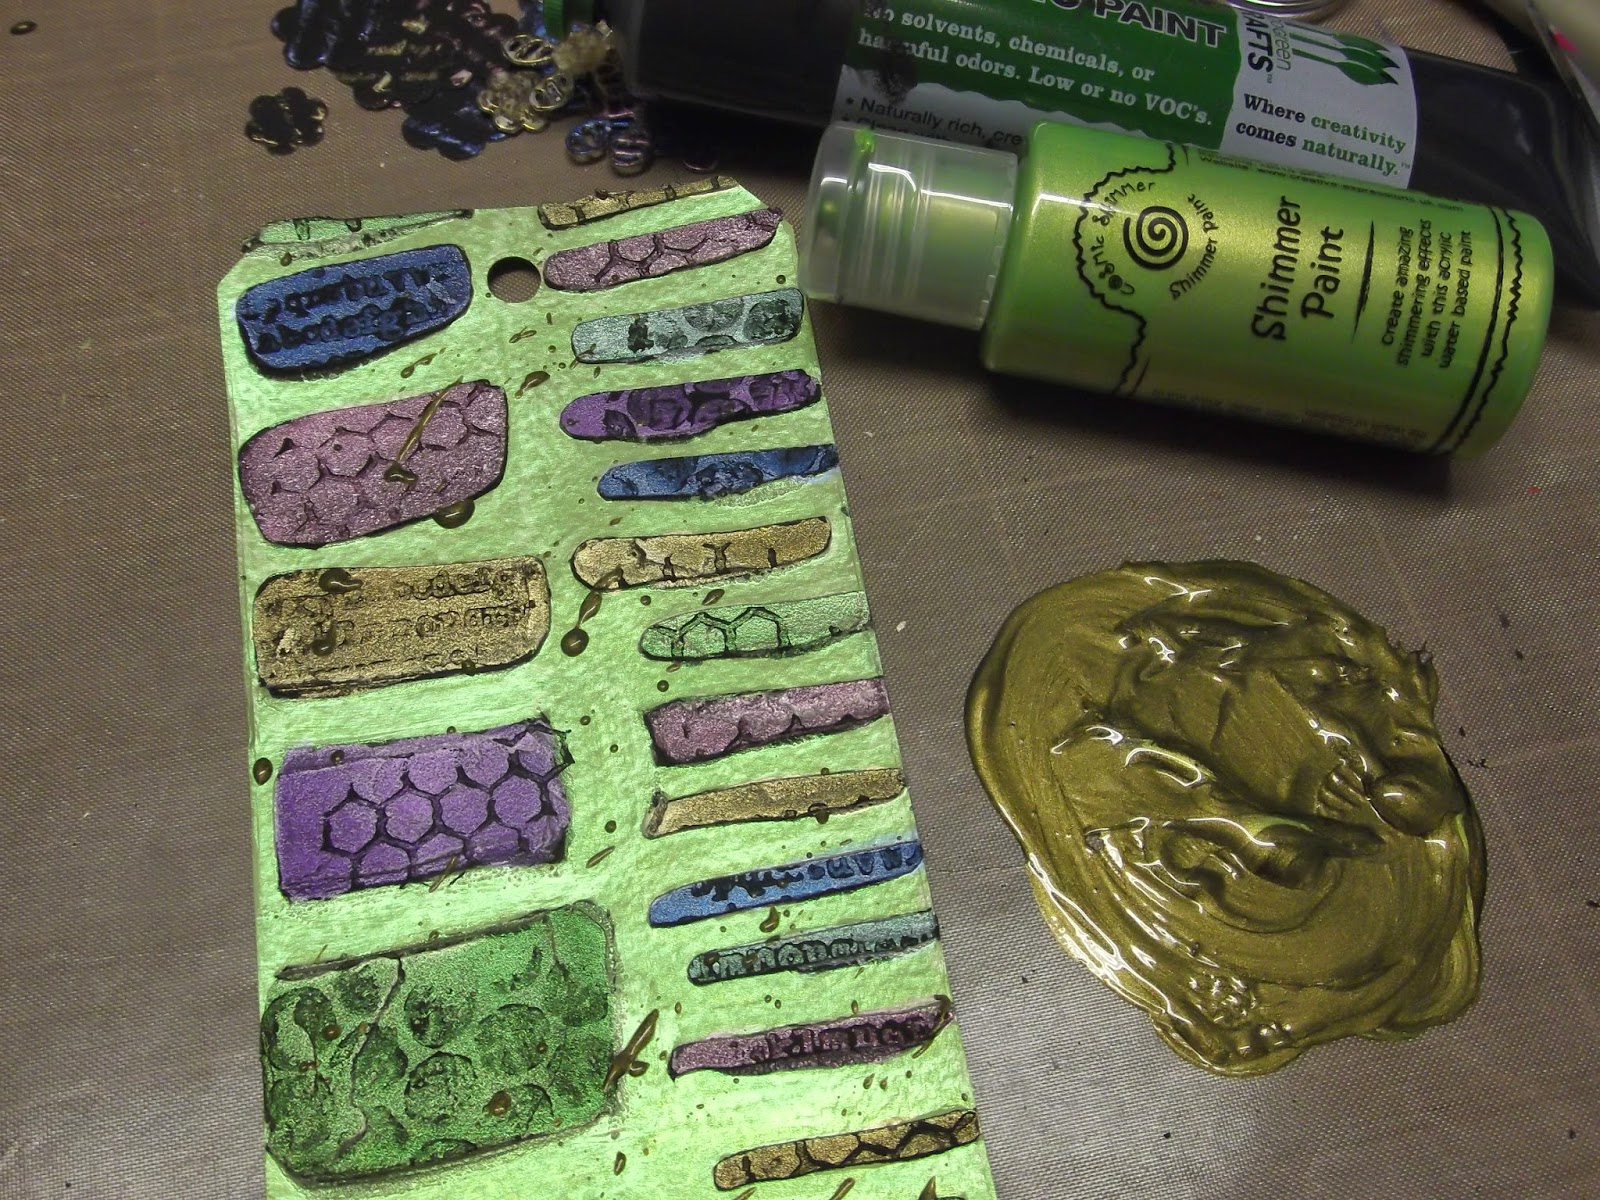
I felt that the panels needed some texture so I took Eco Green Black Paint
and stamped through the stencil Creative Expressions stamps Bubble Wrap, Alpha Writing
and Chicken Wire (great stamps for mixed media).

Really loving the texture the stamped paint gives.

I wanted some splatters so I used Eco Green Black Paint on it's own and
mixed with Cosmic Shimmer Paint Gold Lime.

I took some black ribbon and used the water colours to colour it, I was really
surprised how vibrant it was.  I left it to dry overnight, but the this morning it was
slightly dull and dark so I really think it could have done with a few more coats.

When I painted the tag at the beginning I also painted some extra card stock, I always
do this in case I want some more for sentiments etc, I stamped the ART stamp
from Creative Expressions Vintage Artist Stamp Set with Archival jet black inkpad.
I then used the black paint to edge both the tag and the sentiment I then watercoloured
around the edges of both.

I then stuck the flowers on, building them up first with each other.
I then added black card around the edges, added some doodling and then the ribbon.

These are the journal pages I had started before it all went very very wrong.


Right I better be off, thank you so much for joining me this morning.  I shall be back this evening with the tutorial that I was supposed to put on here on Saturday lol.
Happy Crafting :-)
Hugs Kezzy xxxxx

Sunday 27 July 2014

Paperartsy Inspiration - Locked Inside My Own Head

Hi ya, just popping on to show you my playing session today and last night for the Paperartsy Inspiration Challenge and this week I just had to play along with Darcy Wilkinson who played with glues this week.  You really need to see what she has done, it's truly awesome what you can do with some glue gel, also you neeeeeeeeed to pop over to her blog, she is such an amazing artist :-).  I also have mentioned two more ways that I use it, the last two pics plus the Locked inside my head ATC.  Both ATC's are available for a swap if your interested :-).  All the products are at the bottom of the page, also I separated it into what products I used for which ATC.
These are the results of playing, I used a High Solid Gel
as I didn't have the regular.

My first ATC also shows the other way I use the gel, around the corners
is some texture, I highlighted it with Treasure Gold, well it's great for rust 
techniques as well, it's playsand mixed with the gel, because the gel stays in place
you can really make the texture stand out, I have a tutorial for this when
I use Paperartsy paints and stamps to make a hot air balloon, but it won't be
on here until the 7th August :-)


Here you can really see the sand texture.

I just love the swirls, I did this with a scrapper tool.

I love this picture, it really shows the eyes and makes it spooky,
I also love how the gel picked up some blood orange on my mat while
I was adding the treasure gold, it lands right in the corner of the eye,
I meant to do that really!!!! lol

It is a bit bright compared to the above lol.
Now I wanted to use my pens to give a really cool background where you
keep adding pen then water to get it to cling to the edges of the gel, but
after 3 tries I realised that I hadn't used water paper, so I couldn't do any
more without the ATC falling apart so I added a final layer of limelight and water
dripping down into some areas.

You can see how the watercolour looks when it grabs the edges, I really
love how it does this.


 Another favourite with me (which I have just finished doing a step by step with
dylusions and this technique so will be on the blog shortly) is to
use my Dylusions to spray through a stencil, let it dry, then make sure your 
stencil is clean and put back into place and add the gel.
Because the underneath is reactive to wet medium, the gel
absorbs the colour underneath give a gorgeous glazed look, plus seals it as well.

Here you can see in the left corner where there wasn't any spray so it stayed clear.

Right I better be off, I go camping next Saturday so my usual Paperartsy Sunday play day will be in the week if I have time, but I can't wait to camp as we will have internet and I'm planning lots of rest while catching up with everyone as I have been so busy I haven't had the time, all my spare time has been playing in my craft room, so I really do apologise and will come and see what you have all been up to while camping.
Happy Crafting :-)
Hugs Kezzy xxxxx

Recipe 
Both ATC's - 
Paperartsy Fresco - snowflake
Golden High Solid Gel
Paperartsy Cardstock
Paperartsy stamp for ATC back - MN32
Artful Bloom ATC -
Paperartsy Fresco - pansy, limelight, blood orange
Paperartsy Stencils - PS006
Paperartsy Stamps - ELB03,04
Paperartsy Grunge Flower 3 die
Caran d'Ache Fibralo - 185 - 220,210,249,245
Treasure Gold - brass, green amber
Archival jet black
Promarker black
Mod Podge mold
Locked Inside My Own Head ATC
Paperartsy Fresco - brown shed, cinnamon
Paperartsy Stamps - Urban snapshots stage lights, Eclectic 6
Tim Holtz stencil - stripes
Treasure Gold - onyxite, copper
Archival potting soil
Distress Ink - gathered twigs, antique linen
Stampendous alphabet stamps

Friday 25 July 2014

Unruly Paperarts - Layered Journal

Hi ya, I can't believe it's Friday where is the time going, I am a Finance Manager for a private nursery and we swap over to a holiday club when schools close for summer and they are always so much to sort, closing the fees on children leaving and getting ready for the summer fees.  Thank goodness it's all done, I am trying to sort my DT projects as I go camping a week tomorrow, but luckily the camp site has internet and I'm planning on one thing, catching up and commenting on all my favourite blogs, I'm so sorry I haven't got around to everyone yet, especially my team mates at Unruly Paperarts this month is layer by layer and wow they have all done so many different things and today my tutorial has gone live and I have done a layered journal with full tutorial.  Here are some pictures to tempt you over there lol :-)
I would like to enter the following challenges :-
Crafty Girls Challenge - Anything Goes
Fan-Tastic Tuesday Challenge - Anything Goes
613 Avenue Create Challenge - Anything Goes/optional Party Theme
Crafting By Designs Challenge - Anything Goes
Craft For The Craic Challenge - Your Favourite Colours (red, lime, purple are my favourite colours at the moment, especially Paperartsy Fresco paints - Blood Orange (redy pink), Limelight (lime green) and Pansy (purple) so I mixed them up together :-)

Lots of pics :-)


Also these are the pages still to be finished -


This shows how I put it all together :-)


Right I better be off, I'm back tomorrow with another step by step on here, then Sunday I am in the middle of a Paperartsy make, Monday Creative Expressions journal page and next week I have another step by step here lol.
Happy Crafting :-)
Hugs Kezzy xxxxx