Monday, 10 February 2014

Creative Expressions - Chalky

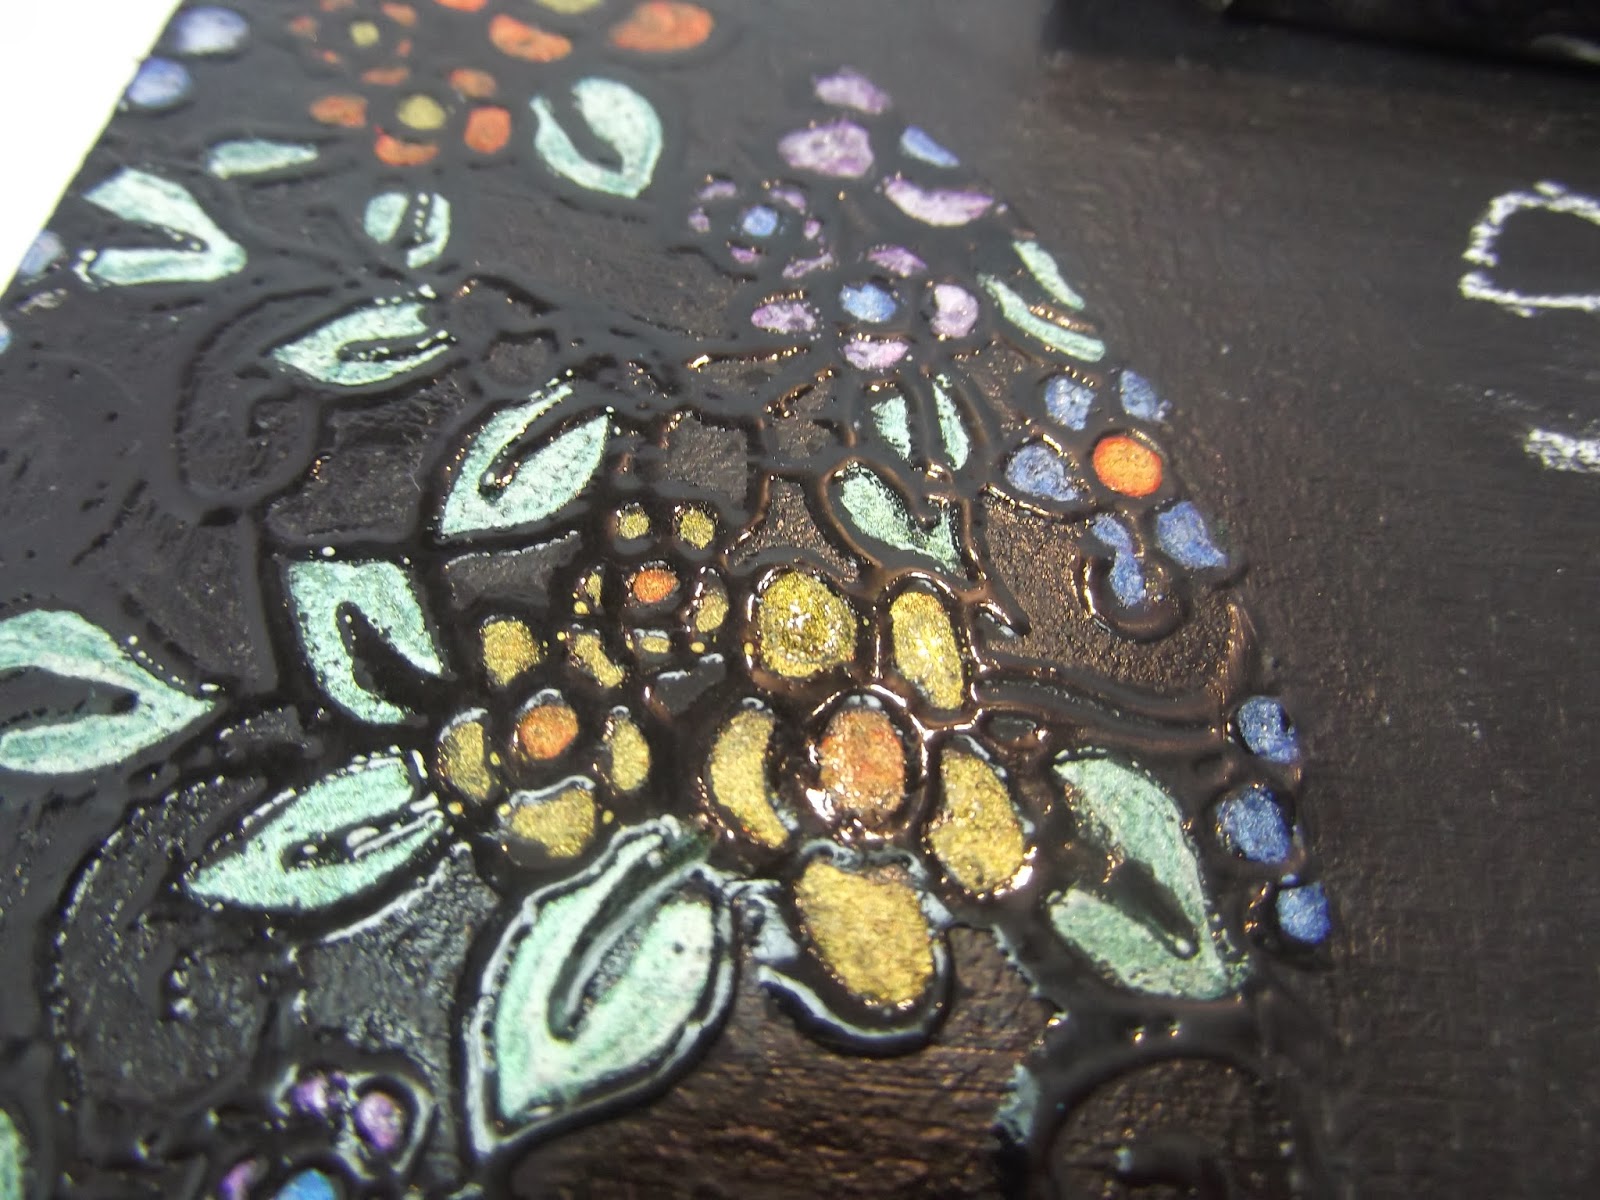
Hi ya, yep it's time for my creation for the Creative Expressions Blog and this month we have been working with background stamps and had the chance to work with MDF items to alter.  I used a frame and took it apart to make two decor items for my kitchen (one will be shown this week and one next week). I also used the Cosmic Shimmer Watercolours on black paint, which really made the background pop :-).
As always I shall highlight the Creative Expressions Website products in red during my step by step.

My first piece of decor is a chalkboard for my kitchen.

Lots of close up pictures


And now for the step by step ...........

This is the frame I started with.  Creative Expressions sells lots of 
different type of MDF products to alter, this is the
Baroque Square Frame.

For this project I used the bottom half, these had holes in them,
so I just used some glue gel and added tape over the hole over night
then took the tape off and I had a flat surface for painting.

Both pieces of decor where painted with Eco Green Black Paint, both
sides.  The circle is for next weeks creation :-)

While that was drying I painted some card stock so I could have
a play with what colours I wanted for my chalkboard.
Because the surface is painted, the watercolour doesn't seep through so
you get a lovely intense colour, especially with the Eco Green paint as it's
a lovely Matt surface.  I tried a mix of Cosmic Shimmer Watercolours and
Cosmic Shimmer Drawing Ink.  You must remember that the colour
shown in the pot is not necessarily what is going to be on the black surface
as some change completely.
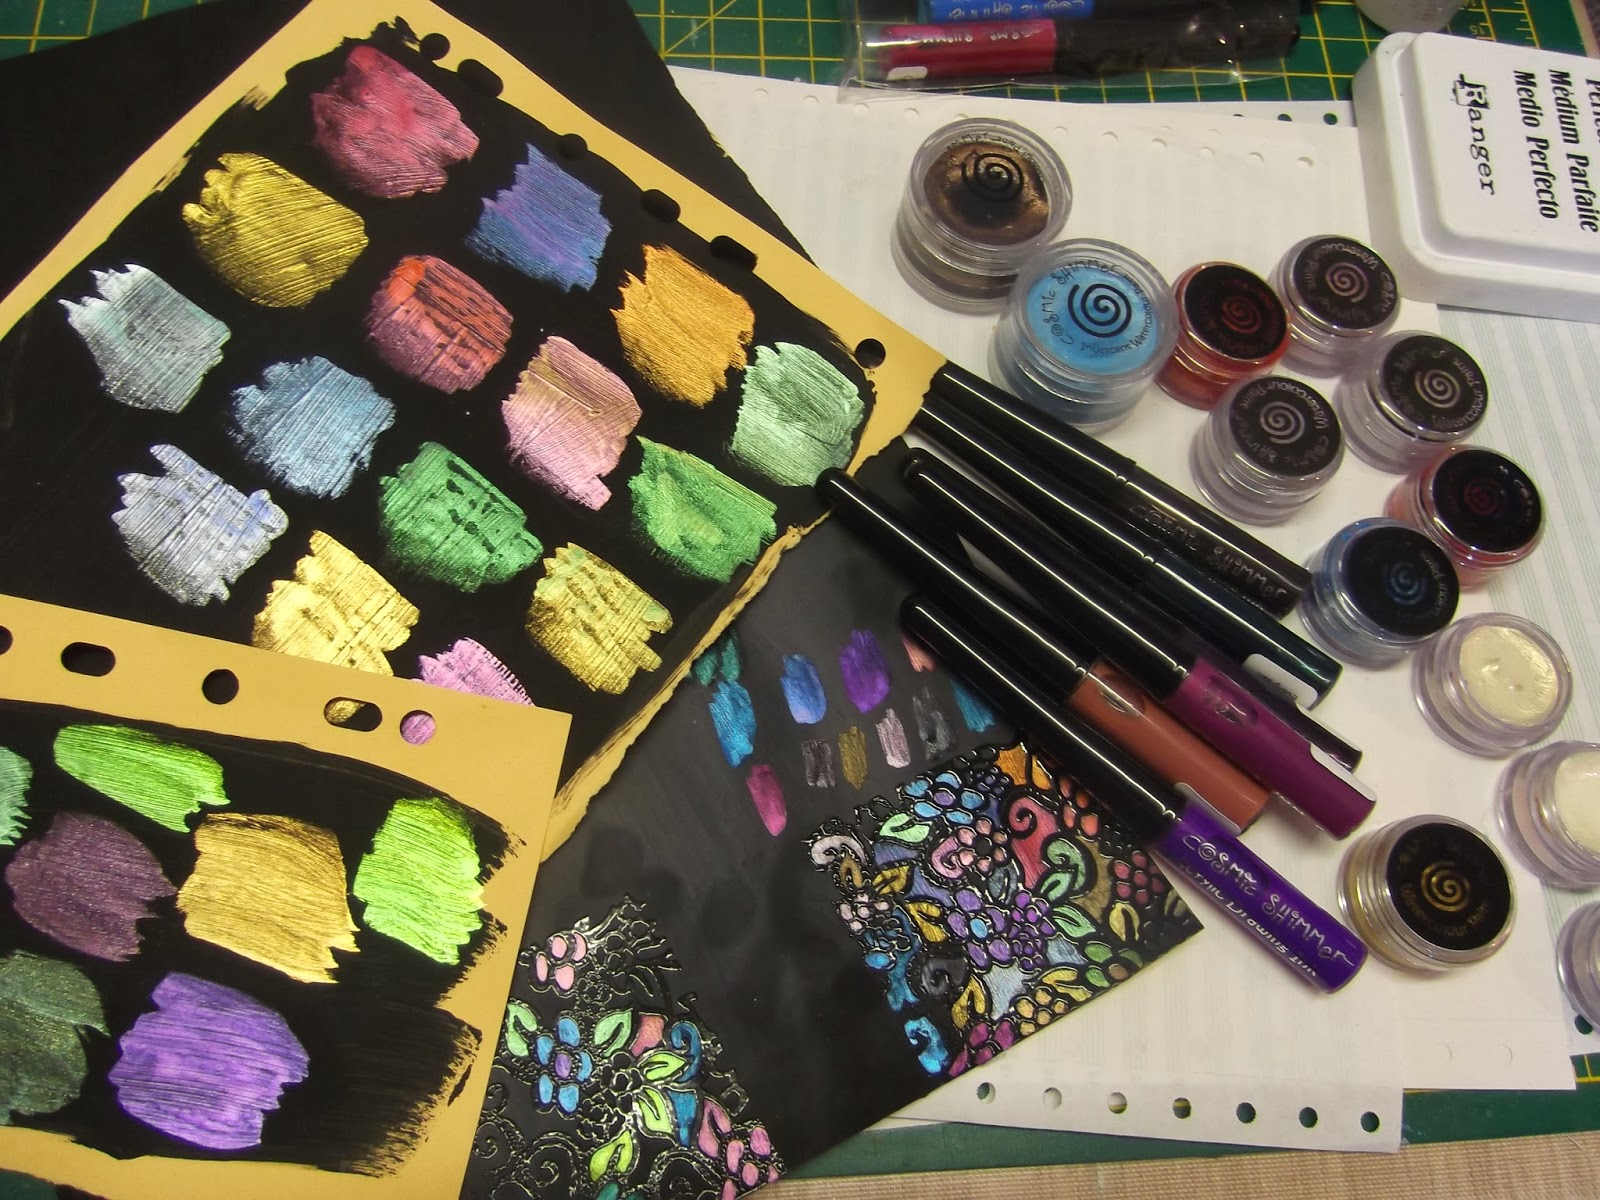
Don't all the colours look lush.

I still can't get over how vivid and bright they are.

The square on the right is what we are using this week, and the
outside of the frame and circle is what we will be using for next week :-)

 To start with I stamped the Creative Expressions Floral Background Stamp
with Ranger Perfect Medium and Cosmic Shimmer Clear Embossing Powder.

I only wanted my flowers to go around the edge so I used some ripped
copy paper to mask the rest of the board.

Wherever I had to do a join, I used a versamark pen to join in any missing
areas so I could embossing them.

I used Cosmic Shimmer Watercolours in Green Pearl, Olympic Gold,
Golden Scarlet, Blue Pearl and Lilac Pearl.


I took a piece of card big enough to wrap around my piece of chalk,
and embossed and coloured like above.

I attached with a heat glue at the top.  I also make some holes at the top to hang
the chalk board up.

I used Tim Holtz Ideology Chain for the hanging element of the chalk board.

Next I used a clear chalkboard paint.

Even though I loved the Matt finish of the paint, because it would be
hanging in my kitchen I decided to use Cosmic Shimmer Clear Varnish Lacquer,
over the area without the chalkboard paint.  The best way to do this is do the
black areas first, then all the separate colours as they do seep a bit on the brush.

After 24hrs I primed the chalkboard area by rubbing a piece of chalk up and
down and rubbing it out.  Then your chalk board is already to go.

Right I better be off, hope you enjoyed my step by step and don't forget to pop back next week for the matching decor item project.
Happy Crafting :-)
Hugs Kezzy xxxxx

Sunday, 9 February 2014

Paperartsy Inspiration - Reading is my Sanctuary

Hi all, I have just popped on to enter my bookmark into the Paperartsy Inspiration Blog and this weeks designer is the ultra amazing Claire Lloyd, her work and her blog is truly awesome and so inspirational.  I have took inspiration from her first creation which is a tag, but I did a bookmark instead.  I love reading and lost my bookmark ages ago, and I have been meaning to make on but never got around to it, but the minute I saw her tag I knew it had to be a bookmark lol. She also teaches you, this week, to draw a face, I haven't quite finished mine so will blog it sometime next week.  Just realised, I haven't taken any pictures of the back, it's exactly the same but without the wording, also I used canvas sheets not a tag so it would be nice and soft for my book :-).

One of my colour combinations this year is going to be
blue and green.  I am always inspired by Alison Bomber (aka Butterfly)
who uses these colours alot in her art so I thought that
I shall have a go.  I really love the colours together, but I think
it my mums saying of 'blue and green should never be seen',
I think that it means in clothing, as I think they look gorgeous
together.


I find that using my gelli plate while stamping is so much easier,
I get the right amount of paint on the stamp.
And of course I can use the paint for a print.

I used two tags that I had already used for mopping up, to
use on the leftover pattern on the gelli plate.

I wanted the word Sanctuary and many times trying to ink just that part,
well I decided I would cut it out instead, which means that I could
use another word in that area when using the whole stamp.

As you can see here, I get a nice image with my gelli plate, but I also
get a nice print just using foam or a paint brush, I just find this way quicker.

I used Fresco Guacamole and mixed it with Fresco Satin Glaze to
do my kiss stamping dots (I did a quick tutorial here showing the kiss stamping
with Paperartsy Lin Brown stamps, they are made for this technique lol).
By mixing the glaze in, it helps the paint stay wetter a little longer (not much
as that's the best about Fresco it dries quick and gorgeous),
but long enough to do the kiss stamping.  
I had loads left so out came some more mopping up tags, I also 
used the flower about, as you can see the opaque paint becomes slightly translucent 
but not much.  

Right I better be off, I have a day in the craft room so want to be getting inky and painty lol.  Starting from this evening the ultra awesome amazing and good friend Julie-Ann Lee will be demonstrating over on the Paperartsy Inspiration Blog and she always makes such gorgeous creations.  Also this week Paperartsy shall be showing all their new products which I am so excited about, it started last night with stamps from Darcy Wilkinson who's art and stamps are really out of the box awesome, I can't wait to own some lol.
Happy Crafting :-)
Lots of Hugs
Kezzy xxx

Recipe
Paperartsy Stamps - HP1006 (sanctuary), LPC014 (script), ELB04 (flower), HP1005 (swirl), Words 2 (letters)
Paperartsy Fresco Paint - south pacific, mermaid, bora bora, snowflake, guacamole, tinned peas, hyde park.
Paperartsy Fresco Satin Glaze
Other stamps - Creative Expressions (vintage heart - dots), Stampendous (small typewriter alphabet)
Spellbinders circle dies
Sharpie black pen
Book Paper
Ink pads - Archival (jet black, sap green, aquamarine)
Crafters Workshop Stencils (mini kaleidoscope)
Crawford & Black - canvas sheet
Gelli Plate

Wednesday, 5 February 2014

WOYWW 244

Hi all, it's Wednesday which means it's time for all us crafter's to share our crafting area/desks over at What's On Your Workdesk Wednesday which is hosted by the amazing Julia.  I can't believe I haven't joined in for over a month, I completely missed January.  Of course this was because I was so poorly that I couldn't even get into the craft room.  So today is a happy day for me, I feel at last I'm starting to get back to normal lol.

Yep the dumping desk it truly being dumped on lol.

 My working desk is also full of activity, the tags are for
a Paperartsy challenge, the black painted card I'm trying out for
a DT project, and you can see on my black plastic drawers a hint of red,
that's a canvas for a DT project that is almost done :-)

Right I better be off, I have so much to catch up on lol, but I am enjoying the process and that's the main thing :-).
Happy Woyww :-)
Hugs Kezzy xxxxx

Monday, 3 February 2014

Creative Expressions - All Loved Up

Hi all, I know it's been another week, well the good news is I am back crafting and feeling so much better.  Last week was the first time back to normal work, design teams etc and well, you all now what it's like, have a few weeks away and then you have loads of bits to catch up on.  Just getting back to working had me tired lol, so I didn't get much crafting done apart from my DT work.  So this week I shall see you again lol as I'm hoping to post so much more this week.
So today is Monday which means it's time for my DT creation over at the Creative Expressions Blog and this month we are working with two gorgeous backgrounds and some wooden materials.  This week I have used the background on a card for Valentines Day :-).  As always I shall highlight the Creative Expressions products in my step by step.
Wanting to know who the winner of the stamp set giveaway????  To keep you in suspense it's at the bottom of this post lol.

Another card from me this week using the
Creative Expressions Feather Swirl Background.
Best thing about these backgrounds is that you can use
them for any occasion :-)

Lots of close ups.

The reason I doodled around the sentiment is because it was wonky,
but I didn't want to start again with the stamping in the corner so
I have tried to hide it lol.

Lots of lovely texture :-)


I love the shine on triple embossing.

Now for the step by step :-)
To start with I used Creative Expressions cardstock,
with Creative Expressions Feather Swirl Background Stamp 
and Distress Ink Pads Festive Berries, Barn door, Fired Brick
and Aged Mahogany, then embossed with 
Cosmic Shimmer Clear Embossing Powder.

I used all the colours randomly on the stamp.

Then used the embossing powder.

Now initially I was going to ink up around the area,
and then melt with an iron, but I really loved the red on white,
so I decided from this point to carry on heating and embossing,
still using the normal clear embossing not detailed.

At this point I realised that I would have to use Ranger
Perfect Medium to fill in the gaps,

then I covered the whole area for one more lot of embossing.

And here is the finished panel which has been matted with black
and red cardstock.

On my card front I used the stamp with Archival Jet Black
and Archival Wendy Vecchi Red Geranium ink pads and
stamped in the corner of the card.

Next I played around with my layout.  I had decided to have
the ribbon hanging off the side and tied it with Creative Expressions
Twine, the sentiment is from Creative Expressions Vintage Hearts Stamp Set 
and the wooden heart was in my stash.

I decided to use Creative Expressions Adhesive Sheets on my
wooden heart, then I covered it with Creative Expressions Micro Glass
Beads, then painted it black with Eco Green Black Paint.

When the paint was dry I used Creative Expressions Metallic Gilding
Wax Deep Red and a hint of Pearl Moon.

Right now the step by step is done, how about we reveal the winner of the giveaway ..........


I numbered each comment over the last few weeks...
And the winner of the Creative Expressions
Stamp Set Antique Dressform is.........
If you would like to email me your address and I shall
send it over the next few days :-)

Right it's time for me to go and do some accounting work.  I shall be back tomorrow with another DT creation, I am also trying to catch up with all my commenting, so you should see me visiting everyone this week as I have missed out on all your creative work while I was ill.
Happy Crafting :-)
Hugs Kezzy xxxxx