Monday, 18 August 2014

Creative Expressions - Sunny Flowers ATC's

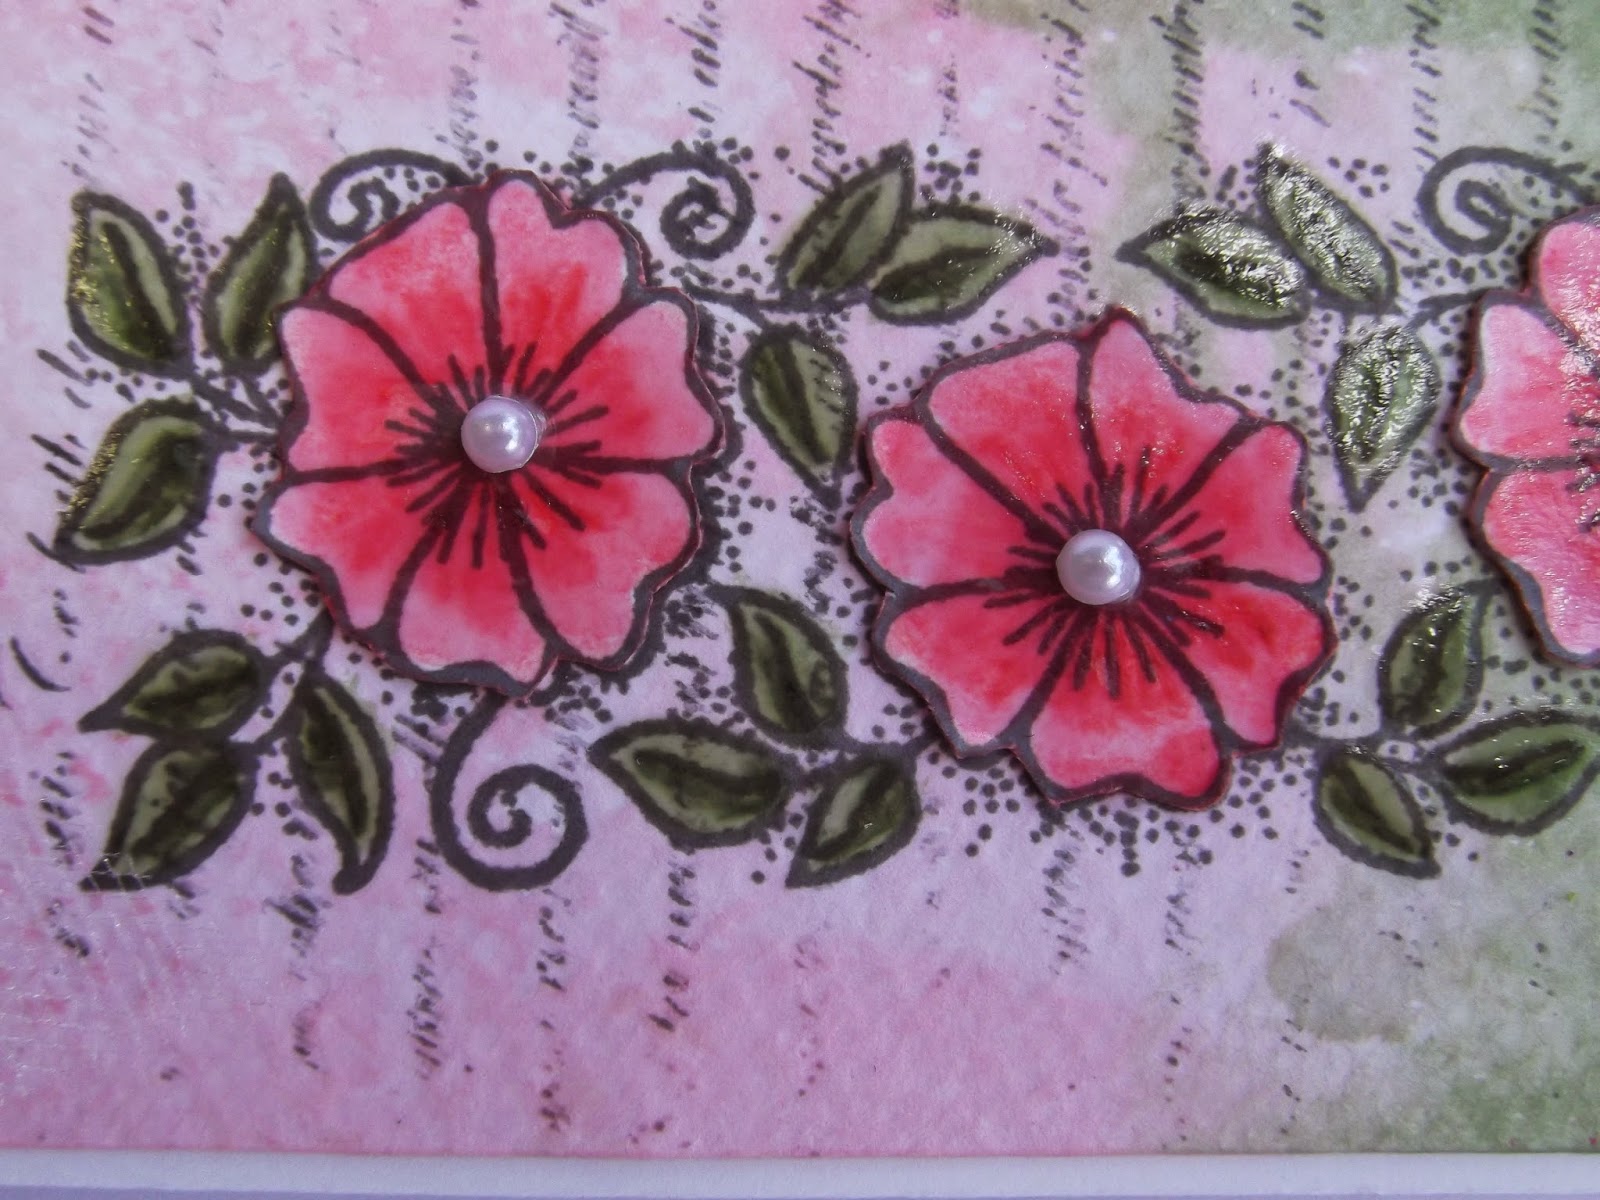
Good Morning, sorry I'm late, my computer seemed a bit temperamental this morning, not sure why lol, probably telling it to do too many things on Monday morning lol.  Today with the weather also being temperamental, I decided to do some bright ATC's.  Initially I was going to add lots of highlights and borders, but in the end the beautiful Flower stamps from Creative Expressions didn't need anything else, so I left them plain.  Pop on over to the Creative Expressions Blog to see all the other wonderful creations by the rest of the DT.  As always I will highlight all the products from Creative Expressions through my step by step.
I would like to enter the following challenges -
Simon Says Monday Challenge - Anything Goes
Papertake Weekly Challenge - Spots and Dots
Crafting By Designs - Polka Dots
The Crafter's Cafe Challenge - Anything but a Card
Through The Craft Room Door - Anything Goes

These ATC's are available to swap :-)


And now for the step by step ................................

At first I sorted out what I was using and I had decided to use the
Creative Expressions Single Stamps Rose Entwined, Calalily Trio, Regal Iris,
Desert Daisies.

I used the ink pad to the paper technique on the cut ATC's and a spare piece of card,
with the colours Distress Ink Festive Berries,
Aged Mahogany, Spun Sugar, Picked Raspberry, Shaded Lilac, Dusty Concord,
Mustard Seed, Spiced Marmalade.
I then sprayed Cosmic Shimmer Mist Pearl and let the ink run.

I then edged the sides with the same colours, except I added Rusty Hinge on the orange
as a darker shade.

I then did lots of flicking of water.

I then used the darker shade through a That Special Touch Distressed Dots stencil.

I started to stamp, I didn't want the border, so I taped it up and inked it up with
Archival jet black ink pad.
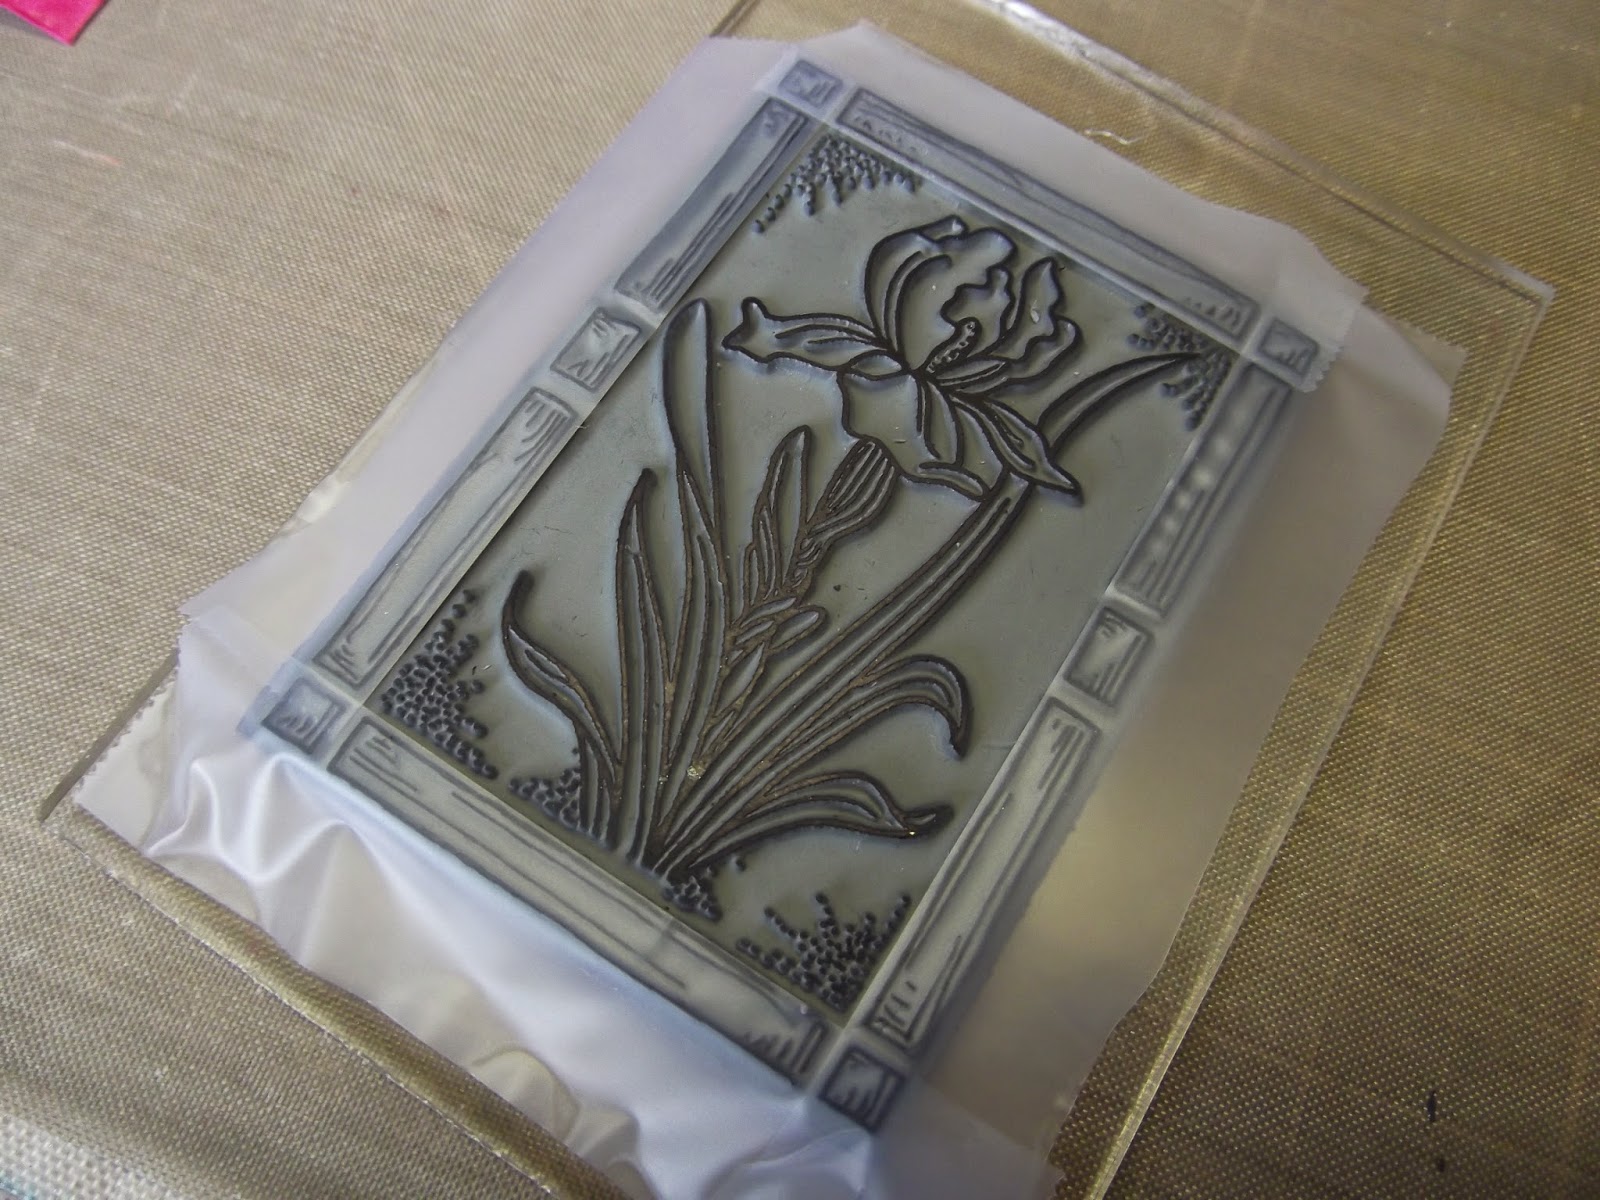
As you can see, after stamping, take the tape off and the ink is only on the flower.

I stamped each flower on to the different colours, I ended up on google to see what
flower is what colour lol.

I then used a baby wipe and wiped the centre to take some ink away.

I then used some Ranger Studio Multi-Medium as initially I was going to add detail
with a journal pen later on so I needed to make the surface water proof.

I re-did the first step to make some green using Peeled Paint and Shabby Shutters.

I then stamped the flower on their matching card and one of the sentiments, I then 
stamped one of each flower on the green for the leaves.

I used my Poloychromas pencils to give each flower highlights, then cut them out, edged with
a black promarker.

For the leaves I used Cosmic Shimmer Clear Varnish Lacquer and on the petals I 
used the varnish mixed with Cosmic Shimmer Twinkles Sparkle Star, then when
the glitter mix dried I went over the petals again with the varnish to make the illusion
the glitter was within the flower.

Right that's all for today, I am planning on cleaning up and then make a start on my craft room, it definitely needs a summer clean lol. Thanks for visiting :-).
Happy Crafting :-)
Hugs Kezzy xxxxx

Saturday, 16 August 2014

Creative Expressions Blog Hop 2nd Project :-)

Hi ya, I'm back today to show you another make I did for the Create & Craft Show and Blog Hop, you can find my post HERE for the blog hop details and where to comment for a prize :-). I also have done a little step by step of the background later on in the post :-).
I would like to enter the following challenges -
Addicted to Stamps and More - Holiday
Crafty Sentiments Designs - Anything Goes
Fan-Tastic Tuesday - Anything Goes
Loves RubberStamps - Out of Season
Suzy Bee's Bloomin' Challenge - Anything Goes
That's Crafty Challenge - Stamping


Now for the step by step background :-)

I painted Eco Green Paint Zucchini onto a small canvas.

Then I added Cosmic Shimmer Crackle Medium.

When the medium was dry I added Cosmic Shimmer Matt Chalk Paint - Vanilla
over it, I so love these cracks :-)

I stamped on copy paper to see where I was going to place the stamping, I then
used Tim Holtz layering stencil Hollybough with some gorgeous Cosmic Shimmer Sparkle
Texture Paste in Berry Red and Emerald.
I also edged the canvas in Emerald which gave a real holiday sparkle to the final piece.
When I did the stamping I highlighted the box and wording with Distress Markers on a clear stamping block as I like to add water and colour with a paint brush.  I also re-stamped the bauble
again 3 times and gave it a 3D effect.

Right I better be off, I shall be back tomorrow with another creation :-). Thanks for visiting.
Happy Crafting :-)
Hugs Kezzy xxxxx

Friday, 15 August 2014

Creative Expressions - Blog Hop Fun

Good Morning, yep it's certainly an early one lol, and yes it's been scheduled!!!  Well it's time for another amazing Creative Expressions August 2014 Blog Hop and today Julia Watts is on Create and Craft TV showing samples of our makes using the new Christmas designs from the Singles Range at Creative Expressions including seven different stamp, as you will see along the way, and certainly by what I have done, they do not just have to be used as they are but can be altered and interchanged to give lots of different options.  It's all about Christmas and the stamps are absolutely gorgeous.  I have one to show you today, one tomorrow and one Sunday. Then scroll down to the bottom to get the full details of where to go next.  Hopefully you have come from  Tracy Heaton and your next step is to go to Pam Smith, but if you get lost along the way the full list and all details are at the bottom of the page after my makes :-).
My 2nd Project is HERE :-)

Today I am showing the Creative Expressions Single Stamp Set Joy To The World,
and I decided to stamp it on fabric for a gift bag.  Now I like to sew bits on like this
but today I wanted to show that you can use glue instead of sewing.
I stamped with Archival Jet Black ink pad onto fabric, then glued it on some brown aida
type material.  Then I used 3 pieces of the Green ribbon and glued this down as well.
All the glueing of the fabric I did with a hot glue gun, but the gorgeous Creative Expressions
Swirls, pearls and white embellishments that already have sticky on them, I just used Cosmic Shimmer
Glue that glues anything, it's fantastic :-)


One randomly selected person commenting on my blog post before the closing date will win the following fabulous prize, which includes some of the new stamp designs :-)


Thank you so much for visiting my blog and taking part in the blog hop, please leave a comment below in order to be in with a chance of winning a prize.
Once you have done that, you will need to go forward to Pam Smith, to help you along the way, here is a list for the blog hop -

The blog hop started today 15th August 2014 at 6am and finishes on 19th August 2014 at 5pm.
I shall be back tomorrow with my next make with these beautiful stamps :-)
Good Luck :-)
Happy Crafting
Hugs Kezzy xxxxx

Monday, 11 August 2014

Creative Expressions - Shabby Chic Tags

Good Afternoon, I know I'm late today, just got off my hols the other day, and last night suddenly realised I hadn't completed my project for today, I reckon all that relaxing has my brain scrambled lol.  My project today for Creative Expressions Blog are 3 shabby chic tags, fantastic for making in bulk.  This month we are using some gorgeous flower single stamps that have just been released, so new in fact that when we received them they didn't have packaging lol.  As always I shall highlight the products from Creative Expressions during my step by step :-).
I would like to enter the following challenges -
Craft-Room Challenge - A Summer Garden
Crafting By Designs - Shabby Chic
Through The Craft Room Door - Anything Goes
613 Avenue Create - Anything Goes/smell, sound, taste, sights of summer
4 Crafty Girls Challenge - Anything Goes
Fantastic Tuesday Challenge -Anything Goes

They could even be made into book marks I reckon :-)


And now for the step by step ............................

I took some watercolour paper and cut three tag size rectangles, this could also
be done as a book mark size.
I then used Distress Ink Pads Spun Sugar and Bundled Sage and pop some
ink on the mat, sprayed with water and swooshed my tag through them, I did this until I like the result.

I then used Creative Expressions Texture Stamp Set script with Archival Watering
Can Ink Pad, I used the second generation stamp so it was light, also random
in places.

I stamped the Creative Expressions Anemone Planter single stamp with 
Archival Watering Can, but first I masked off the frame (like last week when
I shown you with the tape).

I coloured the leaves by using the ink pad and painted 3 layers, then I highlighted with a 
Distress Marker Bundled Sage.

I re stamped the flowers, coloured them with Distress Markers Spun Sugar and highlighted with
Worn Lipstick, then cut them out.

I painted on the leaves and flowers with Cosmic Shimmer Clear Varnish Lacquer,
to give them a gorgeous shine.

I coloured the edges with the corresponding ink pads from earlier.

I stamped the greetings from Creative Expressions Single Stamp Rose Entwined,
Desert Daisies and Sunflower Delight with Archival Jet Black Ink Pad.
As you can see, these stamps mix and match lovely.

I then layered the tag on some Creative Expressions Card Stock Coconut and 
used Creative Expressions Ribbon Seam Binding, Pearl Gems, Tulle and White Pearl String
to decorate.

Right better be off, thank you so much for visiting, it's certainly a contrast from yesterday lol.
Happy Crafting :-)
Hugs Kezzy xxxxx