
I would like to enter the following challenges -
613 Avenue Create Challenge Blog - Anything Goes (which I went for)
Deep Ocean Challenge Blog - Favourite Colour Combo - night time blues are my favourite :-)
Simon Says Stamp and Show Monday Challenge Blog - It's a Mystery - My embellishments were created by? and I also used a spray called Astral Mystery :-)
All the products I used are at the bottom of the page.
I have also done another step by step, I probably starting
to bore you all with these step by steps lol.
Here is my creation called Nightfall

Lots of close ups :-)


And now for the step by step -
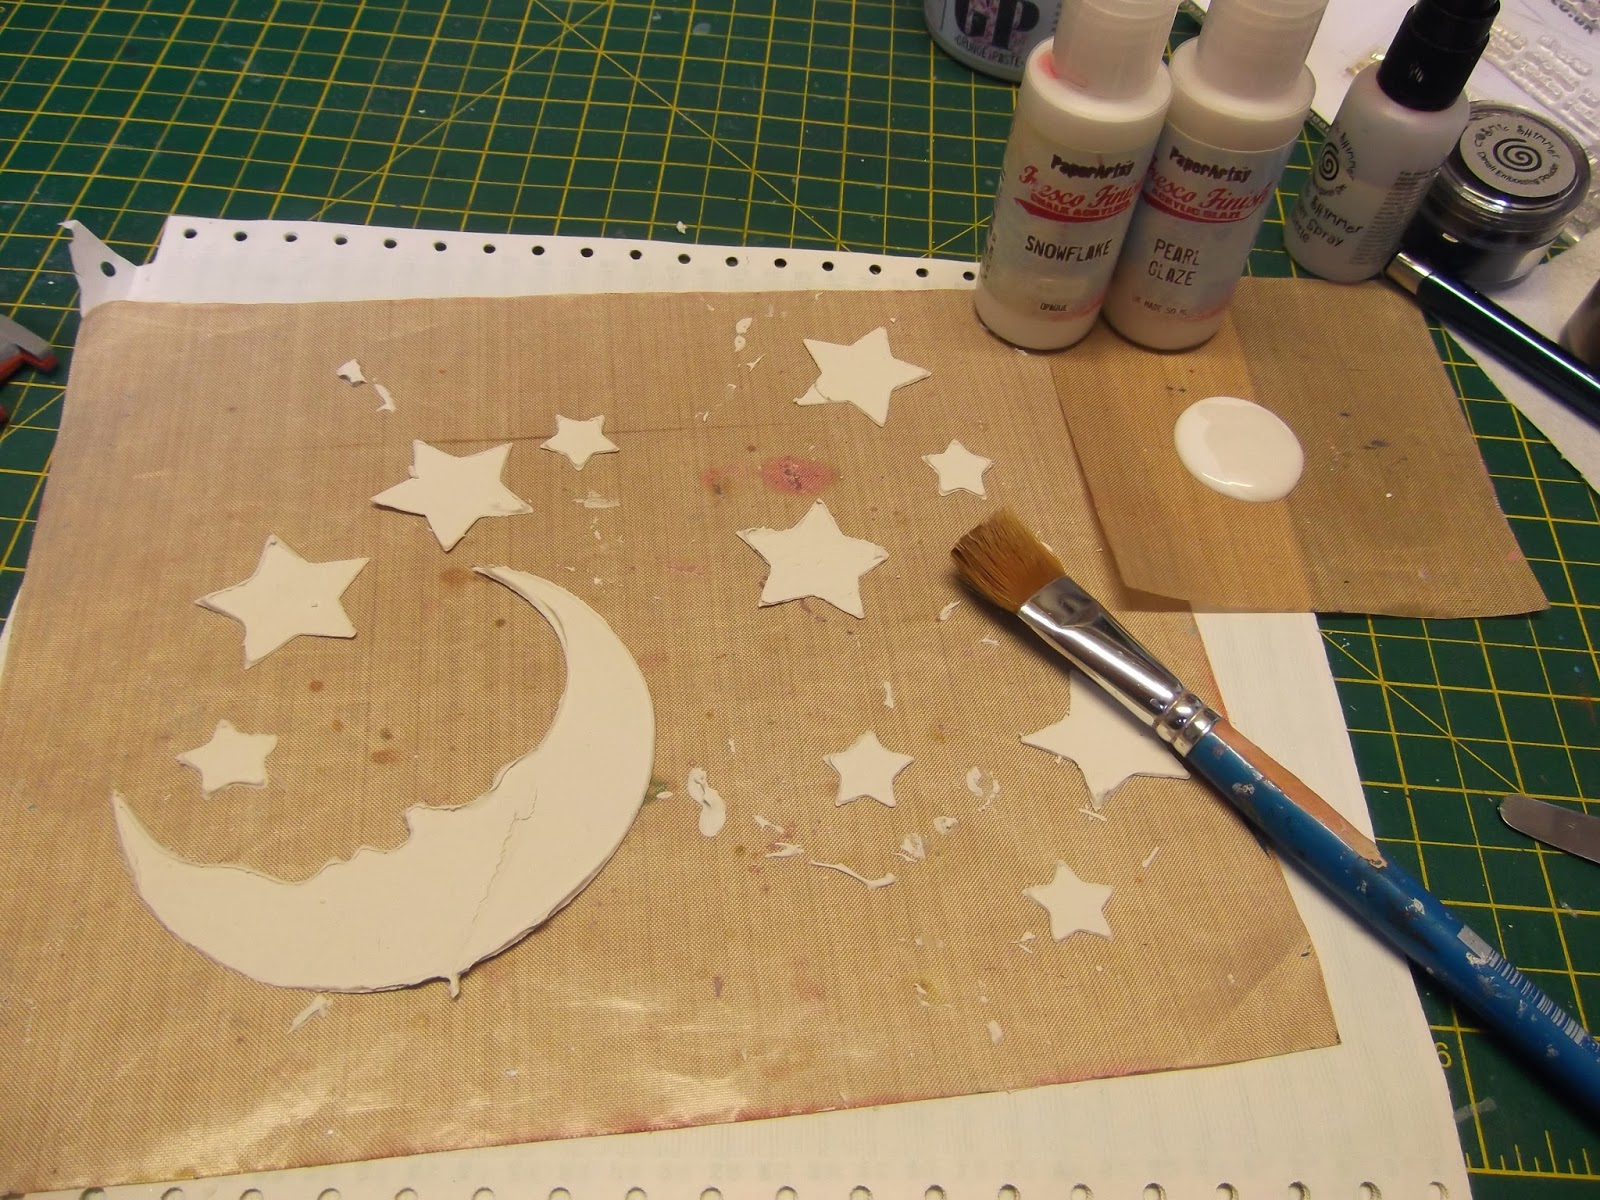
I decided to have a go making my own embellishments.
I started with this gorgeous mask by That Craft Place and
some Paperartsy grunge paste which is awesome.

I did one moon and lots of starts as the stars are small
they might snap so I always do more lol.
When you add the paste, put it through the stencil rather thickly.

While that is drying I did my background. I used 600gsm card,
I found a company in the UK which only sells card and envelopes,
I reckon they are more for business not craft, but they have
started selling in small bundles, I got 5 600gsm for £3.60 (which I have
seen can retail really expensive on the high street for one sheet) and you
can get smooth silk card 350gsm 50 sheets for £4.20 they are
a fantastic company it's called Papercard :-)
(no I don't own shares lol)
Where was I, sorry yes, so I started using grungepaste
with some stencils.

You can see at the bottom I made a mistake, but it wiped up
fantastically and you can't see it on the finished project :-)

All ready for the next step

As always I tested which dylusion sprays I wanted plus
I always like to add some cosmic shimmer mist for sparkle.

I misted with water first, because the card is
600gsm it took water really really well.

Spray all over moving it around so it all blends.

See the poodle in the corner, when you dry the first layer,
dip your background in it for drips etc, you don't want to waste lol

This was the send layer, the next layer was just covering up the lighter
bits that I didn't take a picture oops, also
I always then splatter water on (like distress) to make blobs :-)

Now back to your embellishments, I always use
a (oh my goodness, what are they called eeek)

Next I used Paperartsy snowflake mixed with pearl glaze
and painted the embellishments.
While they were drying I used a stamp for buildings at the bottom,
I used some embossing powder as well.

You can see the embossed buildings here but also you
get a good look at the white blobs and where I sprayed
earlier to cover the lighter areas. Aren't those blobs lovely lol

Back to the embellishments, next I sprayed with some cosmic
shimmer mist.

While I had the mist out I also sprayed on the background,
especially over the buildings as the mist gives this type of aura
around the building as if the moon and stars are shining on them.

Blimey back to the embellishments, now I stamped over them with a script
stamp.

Ooooooo they look so shiney :-)

I wanted more stars but in the background, I remembered I had
this radiant rain colour so I used that with a piece of cut and dry.

Next I stamped my sayings stamps.

I edged with Distress paint chipped sapphire and used some
treasure gold over the grunge paste and the edges.
Then I found some black foam board I had, and used that as
an extra layer.

Right, time to go, I have tomorrows post to type out now lol. Hope you didn't get too bored, have a go at the embellishments, they are so much fun. Hope you have had a fantastic weekend. See you tomorrow.
Lots of hugs :-)
Kezzy xxxxx
Recipe
Stamps - Visible Image Stamps (inspire, dream, imagine), Crafty Indiviudals (CI-017), Paperartsy (LPC012)
Stencils - That Craft Place (moon and stars), Crafters Workshop (mini branches), Tim Holtz (stars)
Paperartsy - grunge paste, fresco snowflake paint, fresco pearl glaze
Radiant rain luminarte
Treasure Gold - white fire and green amber
Sprays - Dylusions (london blue, campso teal), Cosmic Shimmer mists (pearl, astral mystery)
Distress paint - chipped sapphire
Cosmic Shimmer black detail embossing powder
Versafine ink pad
Archival jet black ink pad
Foamboard
600gsm card.
11 comments:
The beauty is in the details! :D) This is a fabulous mixed media project and I just love seeing how you brought your concept to design. Beautifully crafted! Thanks for sharing this lovely creation with us here at 613 Avenue Create!
Hugz,
Chana, Owner
Wowza Kezzy! I am in love with your project... and the fact that you give a step by step is fantastic! I've read every word and checked out the pictures to see how that translates... don't stop with the teaching/sharing ever! Thank you for playing “Anything Goes” at our house and keep coming back!
~ginny DT for 613 Ave Create
RubberMAD (GettyCollection.com)
Fabulous night sky! Love the pop of the shimmer stars and moon. This is so pretty. It brings back memories of cold crisp nights outside looking up at the incredibly bright moon and stars. Lovely! Thank you for playing along with us at Simon Says Stamp Monday Challenge!
WOW (in capital letters)! This piece really inspired me. I love the deep and rich color of the sky and the techniques behind this piece are amazing! I also like how this project totally combined elegant and whimsical elements (like the tilty skyline). I simply love this piece and really admire the work that went into it. Stunning and I'm so glad you shared this with us here at the Simon Says Stamp Monday Challenge blog!
Such fabulous depth... feels like you're looking into the depths of the night sky with all those layers. Fabulous shimmery finish to the whole piece - it's gorgeous!
Alison x
Gorgeous depth to that background creating a beautiful wintry sky for that fabulous skyline.
Wishes
Lynne
Absolutely gorgeous! I love that LP stamp and you've used it on a brilliant make. I love winter nights too! Julie Ann xx
this looks absolutely awesome Kerry - love the techniques you have used - brilliant use of the grunge paste - wonderful xxx
Such a beautiful, richly detailed piece! I love that you made your own embellishments!
Such a gorgeous project, love the detailed tutorial, thank you for joining us at 613 Avenue Create
Alex x
So Pretty, thanks for sharing with us at Deep Ocean
HUGZ Fleur xXx
Post a Comment